

To use data validation in Excel, select the cells you want to control, go to Data > Data Validation, choose a rule type such as Whole Number, Decimal, Date, Text Length, List, or Custom, then set the allowed values and error message.
| Validation Type | Use Case | Example |
| Whole Number | Limit quantity or score | 1 to 100 |
| Date | Control date input | After 2026-01-01 |
| List | Create dropdown choices | Pending, Approved, Rejected |
| Text Length | Standardize IDs or codes | Exactly 8 characters |
| Custom Formula | Advanced rules | =AND(A1>0,A1<100) |
This guide covers every rule type, dropdown list creation, custom formula examples, common problems and fixes, best practices for team spreadsheets, and the point at which spreadsheet-level validation is no longer sufficient for business data quality.
What is Excel Data Validation?
Data validation in Excel is a vital tool designed to maintain the accuracy and consistency of your spreadsheets by controlling the type of data that can be entered. Acting as a filter, it ensures that only valid and appropriate data makes its way into your cells, thereby preventing errors that could compromise the integrity of your data. By defining specific rules—such as limiting entries to numerical ranges, requiring specific formats, or restricting input to predefined lists—you can effectively block incorrect or irrelevant data from being entered. This not only keeps your data clean and reliable but also supports more accurate analysis and decision-making. Setting such parameters is essential for anyone looking to streamline their workflow and ensure that their datasets remain dependable.
Data validation serves three purposes:
- Accuracy: Ensures entries conform to expected types, ranges, or formats.
- Consistency: Standardizes categorical inputs (e.g., department names, status codes) across users and sheets.
- Efficiency: Reduces time spent cleaning, correcting, and reconciling data after entry.
It is important to understand what data validation does not do: it does not validate data already present in cells (unless you manually circle invalid entries), it does not enforce referential integrity across workbooks, and it does not prevent programmatic or paste-based overrides unless specifically configured. These limitations matter when evaluating whether Excel validation is sufficient for your use case.
How to Use Data Validation in Excel
Accessing the Excel Data Validation Tool
Navigating the Excel interface may seem overwhelming initially, but it’s simpler than it appears. Everything you need to set up data validation is conveniently located on the ribbon at the top of the screen. Begin by opening your Excel spreadsheet and selecting the "Data" tab. This tab is your gateway to various tools designed for efficient data management. Within the "Data" tab, focus on the "Data Tools" group, which contains the essential "Data Validation" option. Clicking this button opens the data validation dialog box, where you can start setting up the rules that will control the type of data allowed in your spreadsheet. Whether you want to restrict input to specific formats, ranges, or lists, this tool provides a straightforward way to ensure that the data entered into your spreadsheet is both accurate and reliable.
Creating Simple Excel Data Validation Rules
Creating data validation rules in Excel is both easy and powerful. Once you’ve accessed the data validation dialog box, you’ll encounter various options for defining the criteria for data entry. You can specify the type of data that can be entered, such as whole numbers, decimals, dates, or even values from a predefined list. For instance, if you want to limit entries to whole numbers between 1 and 100, simply choose the "Whole Number" option and set your desired range. This ensures that only valid data falls within your specified criteria, reducing the chance of errors and enhancing the accuracy of your spreadsheet.
Setting Error Alerts
On the Error Alert tab:
| Style | Behavior | When to Use |
| Stop | Blocks invalid entry entirely | Mandatory compliance fields (IDs, dates, amounts) |
| Warning | Shows alert but allows override after confirmation | Fields where exceptions are rare but possible |
| Information | Displays notification without blocking | Advisory guidance; user discretion expected |
Enter a title and error message that tells the user what went wrong and how to fix it. Generic messages like "Invalid entry" waste the opportunity to guide correct input.
Adding Input Messages
On the Input Message tab, add a tooltip that appears when the cell is selected. Use this to explain the expected format, provide an example value, or link to documentation. This proactive guidance reduces errors more effectively than reactive error alerts alone.
Common Excel Data Validation Rules
| Rule Type | What It Controls | Example Criteria | Typical Use Case |
| Whole Number | Integer values only | Between 1 and 999 | Quantity fields, employee IDs |
| Decimal | Numeric values with decimals | Greater than or equal to 0 | Prices, weights, percentages |
| Date | Calendar dates within a range | Between 2026-01-01 and 2026-12-31 | Invoice dates, project deadlines |
| Time | Time-of-day values | Between 08:00 and 18:00 | Shift schedules, appointment times |
| Text Length | Character count | Less than or equal to 50 | Product codes, abbreviations |
| List | Predefined set of values | Comma-separated or cell range reference | Department names, status categories, regions |
| Custom | Any formula returning TRUE/FALSE | `=AND(A1>0,A1<100)` | Cross-field logic, conditional constraints |
Each rule type can be combined with error alerts and input messages to create a complete entry experience. The List and Custom types are the most versatile and deserve deeper coverage below.
How to Create a Dropdown List in Excel
Dropdown lists are the most widely used data validation feature because they eliminate free-text variation entirely.
Static Dropdown (Comma-Separated)
- Select target cells.
- Open Data Validation → Allow: List.
- In Source, type: Active,Inactive,Pending,Cancelled
- Click OK.
Best for short, stable option sets that rarely change.
Dynamic Dropdown (Cell Range Reference)
- Enter options in a separate sheet or column (e.g., Sheet2!A1:A10).
- Select target cells → Data Validation → Allow: List.
- In Source, enter: =Sheet2!$A$1:$A$10
- Click OK.
When the source range changes, the dropdown updates automatically. This is preferable for any list that may grow or be maintained by someone else.
Named Range Dropdown (Recommended for Shared Workbooks)
- Select your option list → Formulas → Define Name → enter DeptList.
- In Data Validation Source, enter: =DeptList
Named ranges are easier to read, maintain, and reference across sheets. They also make formulas self-documenting.
Dependent (Cascading) Dropdown
For multi-level selection (e.g., Region → City):
- Create named ranges for each parent category (e.g., North_Region, South_Region).
- First dropdown uses a static or dynamic list of regions.
- Second dropdown Source uses INDIRECT: =INDIRECT(SUBSTITUTE(A1," ","_")&"_Region")
This technique requires consistent naming conventions but dramatically improves data quality in hierarchical entry forms.
Troubleshooting and Best Practices of Excel Data Validation
While Excel’s data validation feature is powerful, it can sometimes present challenges, especially when validation rules conflict or incorrect formulas are applied. Identifying and resolving these issues is crucial for maintaining data accuracy and workflow efficiency. A good starting point for troubleshooting is to carefully review the validation settings for each cell. Make sure that the criteria specified align with the intended data type. For instance, if a cell is meant to contain a date, ensure that the validation rule is set to accept only date formats. Excel provides error alerts when invalid data is entered—these alerts are invaluable for pinpointing and correcting issues promptly. By following these steps, you can quickly resolve validation problems and maintain the integrity of your spreadsheet.
Common Excel Data Validation Issues
Errors in data validation can lead to significant disruptions in your workflow, but they are often easy to resolve once identified. One of the most common issues arises from incorrect or mismatched criteria in the validation settings. Start by checking the criteria for each cell to ensure they are correctly aligned with your data requirements. Excel’s "Circle Invalid Data" feature is a useful tool for troubleshooting; it visually marks cells that fail to meet the validation rules, making it easier to identify problematic entries. Additionally, if you’re using custom formulas for validation, review them carefully. Even a small error in a formula can cause validation to fail, leading to unexpected results. Adjusting or correcting the formula typically resolves these issues, ensuring that your data validation functions as intended.
Tips for Effective Excel Data Validation
To maximize the effectiveness of Excel data validation, it’s essential to approach it with careful planning and consistency. Begin by defining clear, precise criteria for each data field. Consistent rules across your spreadsheet help maintain data integrity and reduce the chances of errors. Whenever possible, use Excel’s predefined validation options—they simplify the setup process and are less prone to mistakes. Regularly review and update your validation rules to ensure they remain relevant as your data needs evolve. As a best practice, keep your validation rules as straightforward as possible. Overly complex rules not only increase the likelihood of errors but can also confuse users, leading to data entry mistakes. By adhering to these best practices, you’ll create a robust data validation system that enhances the reliability and accuracy of your spreadsheets, ultimately making your data management more efficient and effective.
Best Practices for Excel Data Validation
Consistency in validation rules
Consistency is key to ensuring reliable and error-free data entry in Excel. Applying uniform validation rules across similar data fields not only reduces the likelihood of errors but also streamlines data management. For instance, if multiple columns require similar input criteria—such as specific date ranges or numeric limits—using the same validation settings across these columns helps maintain uniformity and prevents discrepancies. Additionally, utilizing named ranges for dropdown lists is a highly effective strategy. Named ranges allow you to apply consistent list options across various cells, making it easier to manage and update these lists as your data evolves. Another crucial practice is documenting your validation rules. Clear and thorough documentation serves as a valuable reference for future updates, troubleshooting, and collaboration with other users. It ensures that everyone working with the spreadsheet understands the validation logic, making it easier to maintain and modify as needed.
Regular Updates and Maintenance
To keep your Excel data validation rules effective, regular updates and maintenance are essential. As your data needs evolve, the validation rules must be reviewed and adjusted accordingly. Periodically revisiting these rules ensures they remain aligned with current data requirements. When making changes, it’s important to thoroughly test the updated validation rules to confirm they function as intended. This step helps prevent potential errors that could disrupt your workflow. Additionally, maintaining a log of changes to validation rules is a best practice that provides a clear history of modifications. This change log is invaluable for tracking updates, identifying potential issues, and ensuring continuity in data management, especially when multiple users are involved.
Limits of Excel Data Validation for Business Data
Excel data validation works well for controlling entries in a single spreadsheet. But business data rarely lives in a single spreadsheet. When data originates from ERP, CRM, databases, APIs, SaaS platforms, and manual files simultaneously, validation must happen across systems — not inside one file.
| Dimension | Excel Data Validation | Enterprise Data Quality Requirement |
| Scope | Single workbook or shared file | Multiple source systems, databases, APIs |
| Enforcement Point | User interface at entry time | ETL/ELT pipelines, API gateways, database constraints |
| Automation | Manual setup per cell/range | Automated, scheduled, event-triggered |
| Audit Trail | None native | Full lineage, change logging, compliance records |
| Referential Integrity | Limited to same workbook | Cross-system foreign key validation, master data management |
| Scalability | Degrades with file size and user count | Designed for millions of rows and concurrent pipelines |
| Real-Time Enforcement | Only during active editing | Continuous validation on streaming and batch data |
| Governance | File-level protection | Role-based access, policy-as-code, centralized rules |
These gaps do not mean Excel validation is worthless. They mean it solves a different problem than enterprise data quality governance. Recognizing the boundary prevents over-reliance on spreadsheet controls for mission-critical data flows.
When to Move from Excel to FineDataLink
Excel data validation works well for controlling entries in a single spreadsheet. But when business data comes from ERP, CRM, databases, APIs, and spreadsheets, validation needs to happen across systems rather than inside one file.
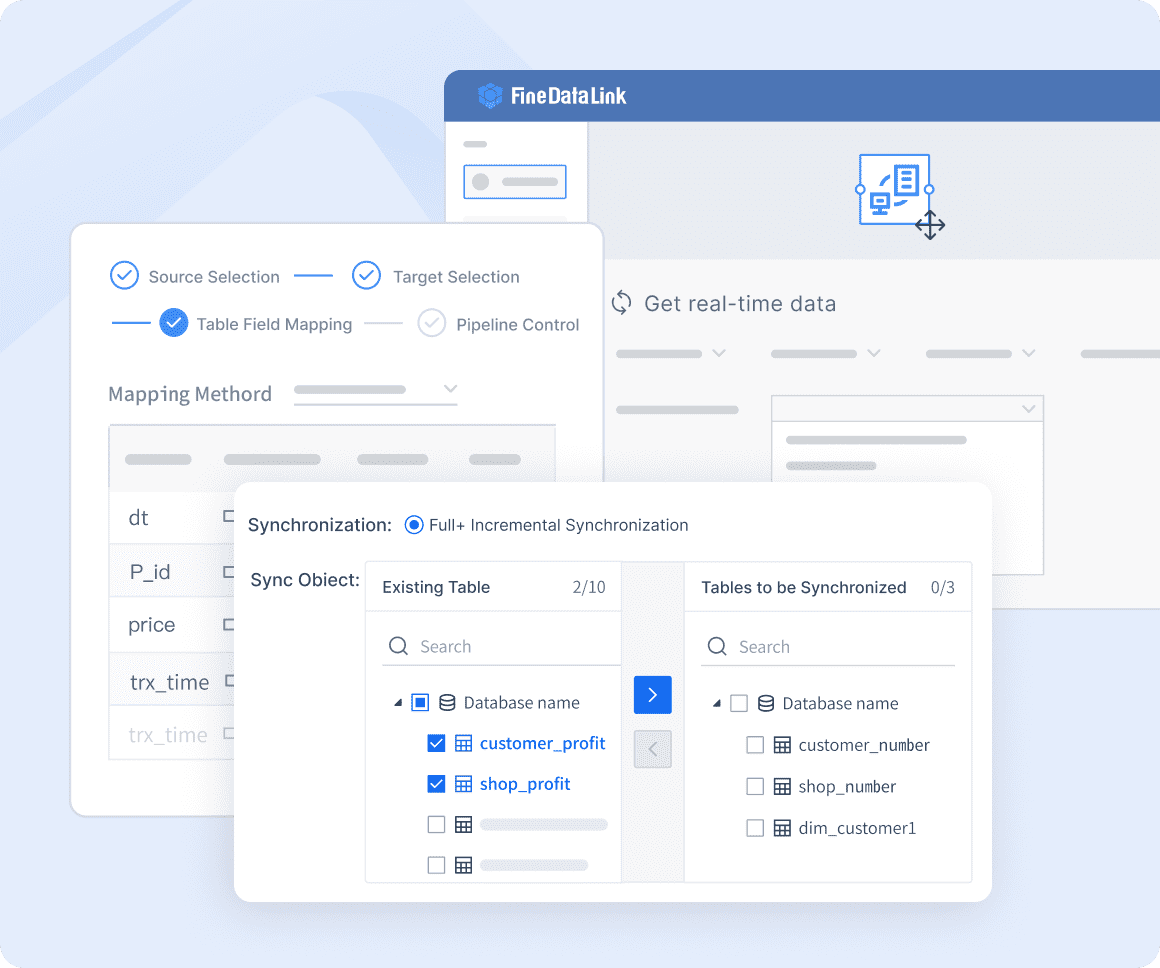
FineDataLink helps teams connect data sources, build ETL/ELT workflows, synchronize data in real time, and apply consistent data quality rules before data enters warehouses, BI dashboards, reports, or AI workflows.
| Use Excel Data Validation When... | Use FineDataLink When... |
| One person manages one spreadsheet | Data comes from multiple teams or systems |
| You only need simple dropdowns or ranges | You need cross-system validation rules |
| Data is manually entered | Data flows from ERP, CRM, databases, APIs |
| Errors are small and easy to fix | Data errors affect reports, dashboards, or AI analysis |
| Rules are local to one file | Rules need to be reused across pipelines |
FineDataLink provides visual low-code pipeline design, 100+ native connectors, CDC-based real-time synchronization, built-in data quality checks, and end-to-end monitoring. For teams that have outgrown spreadsheet-level validation but are not ready to build custom ETL infrastructure, it bridges the gap between manual Excel processes and enterprise data engineering.

Once data is validated and standardized through governed pipelines, Dora can use trusted data to support natural-language analysis, summaries, and anomaly follow-up.

Continue Reading about Data Validation
2025's Best Data Validation Tools: Top 7 Picks
Mastering Data Validation Techniques
Master Data Validation Excel: Add, Modify, Remove Tips
Mastering Data Validation: Ensuring Database Integrity